
Choosing Exterior Paint for Casper’s Sun, Wind, Snow, and Temperature Swings
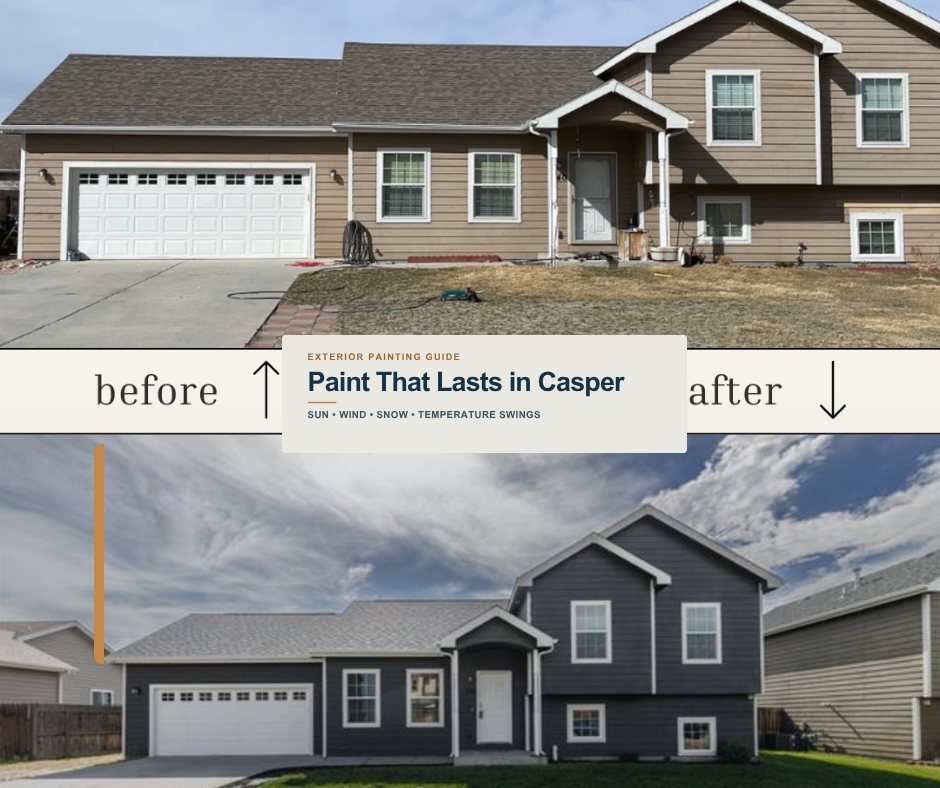
A practical guide to preparation, coating selection, timing, color durability, and maintenance for Wyoming homes
Exterior paint in Casper does more than update curb appeal. It is part of the home’s first line of defense against intense sun, dry air, wind-driven dust, snow, moisture, and fast temperature changes. When the surface is prepared correctly and the coating system fits the material beneath it, paint can protect siding and trim while keeping the exterior looking finished and well cared for.
That is why a successful exterior painting project should begin with questions about the house—not simply a trip to the color wall. What is the siding made of? Is the existing coating chalking, peeling, or cracking? Are there open joints, failed caulk, exposed fasteners, or moisture problems? Which elevations receive the harshest sun and wind? The answers determine the preparation, primer, coating, application method, and maintenance plan.
Why Casper’s climate changes the painting plan
Casper homeowners are familiar with dramatic weather. The National Weather Service’s Casper climate summaries document years with major swings in temperature, snowfall, precipitation, and high wind gusts. Those conditions can accelerate fading, stress brittle coatings, drive moisture toward vulnerable seams, and deposit dust on surfaces that are not fully cured.
A paint project designed for this environment needs four things working together: a sound substrate, thorough preparation, a compatible primer and topcoat, and a dependable weather window. Skipping one part can shorten the useful life of the entire system.
1. Start with the surface, not the color
Different exterior materials behave differently. Wood expands and contracts as moisture content changes. Fiber-cement siding needs attention at cut edges, joints, and manufacturer-required clearances. Stucco and masonry need coatings that suit their porosity and condition. Metal requires rust treatment and a primer made for the specific metal. Previously painted vinyl or factory-finished siding may have color and compatibility limits.
Before choosing products, identify the substrate and evaluate its condition. A professional walkthrough should look for peeling layers, soft or damaged wood, cracked stucco, failed sealant, loose siding, rust, water staining, and gaps around windows, doors, penetrations, and trim.
Paint can beautify and protect a stable surface, but it cannot repair rot, stop an active leak, correct failing flashing, or permanently hide movement cracks. Those problems should be addressed first.
2. Surface preparation is the foundation of durability
The most expensive coating will not perform well on a dirty, glossy, loose, or damp surface. Preparation is where long-term results are won.
Wash away dirt, chalk, mildew, cobwebs, and windblown residue without forcing water behind the siding.
Allow the surface to dry fully before priming or painting.
Scrape and sand loose or failing coating edges until the transition is stable and smooth enough for the intended finish.
Repair damaged material and replace deteriorated caulk with a compatible exterior-grade sealant.
Spot-prime exposed areas and use a full prime coat when the substrate, color change, stains, or coating manufacturer calls for it.
The U.S. Forest Service’s guidance on finishing wood emphasizes that sunlight, water, weathering, wood properties, and moisture control all affect exterior finish performance. That is a useful reminder that paint durability begins beneath the visible topcoat.
3. Match the primer to the problem
Primer is not one universal product. Its job depends on the condition in front of it. Bare wood may need a bonding or stain-blocking primer. Rusted metal requires proper cleaning and a corrosion-resistant metal primer. Masonry may need a primer formulated for alkalinity and porosity. Glossy or difficult surfaces may need an adhesion-promoting product.
On some sound, previously painted surfaces, a premium self-priming coating may be appropriate. On others, skipping a dedicated primer creates avoidable risk. The safest approach is to follow the written specifications for the substrate, existing finish, primer, and topcoat as one compatible system.
4. Choose an exterior coating for movement, sun, and exposure
For many residential siding and trim applications, a high-quality exterior acrylic coating is a strong starting point because it is designed to resist weathering while remaining flexible. But “exterior paint” is still too broad a category by itself. The correct product and sheen depend on the surface, exposure, desired appearance, and maintenance expectations.
Compare products using practical performance criteria:
Adhesion to the prepared substrate and primer
Flexibility through seasonal expansion and contraction
Resistance to ultraviolet exposure, fading, and chalking
Ability to shed water while remaining appropriate for the wall assembly
Suitability for the expected application and curing temperatures
Color retention and cleanability for high-exposure elevations
Product data sheets matter. They specify approved substrates, preparation requirements, spread rate, recoat time, temperature range, and moisture restrictions. A contractor should be able to explain why the selected system fits the home rather than relying on a one-product-for-everything approach.
5. Plan the work around the surface temperature
A warm afternoon does not automatically create a safe painting window. Air temperature, surface temperature, overnight lows, dew, rain risk, direct sun, and wind all affect application and curing.
South- and west-facing walls can become much hotter than the surrounding air. A coating applied to a sun-baked surface can dry too quickly for good flow and film formation. On the other hand, painting too late in the day can leave a fresh coating vulnerable to falling temperatures and overnight moisture.
Wind introduces another challenge. It can push overspray, carry dust into wet paint, speed surface drying, and make ladders or lift work unsafe. A well-planned project may move around the house during the day, following shade and suitable surface conditions rather than painting every elevation on the same schedule.
The manufacturer’s application window should control the decision. If conditions fall outside it, waiting is better than gambling with adhesion or cure.
6. Select colors with long-term exposure in mind
Color is personal, but exposure changes how a color performs and appears. Deep, saturated colors can absorb more heat, show dust, and make fading or chalking more noticeable on heavily exposed walls. Very light colors can reveal grime, splashes, and rust staining. Mid-tone neutrals often balance heat, maintenance, and visual depth, but the home’s architecture and materials should guide the final choice.
Test large samples on more than one elevation. View them in morning light, midday sun, evening shade, and next to the roof, stone, brick, garage door, and fixed metal finishes. A small chip under store lighting cannot show how Wyoming sun and surrounding landscape will shift the color.
When repainting vinyl, fiber cement, or factory-finished products, confirm that the new color and coating comply with the material manufacturer’s requirements. Choosing a dramatically darker color without checking those limits can create unnecessary heat and warranty concerns.
7. Use the right film build and application method
Coverage is not the same as protection. A wall can look uniformly colored while still receiving too little coating. The specified spread rate, number of coats, and dry film thickness help determine whether the finished system can deliver the performance promised by the manufacturer.
Brush, roller, and spray application can all produce professional results when used correctly. Spraying is efficient on large areas, but back-rolling or back-brushing may be appropriate on porous or textured surfaces to work the coating into the substrate. Detailed trim, cut lines, penetrations, and edges often need focused hand work.
Quality control should include consistent coverage, clean transitions, protected landscaping and fixtures, sealed joints where appropriate, and a final inspection under normal daylight.
8. Treat older painted homes as a safety issue
If a home was built before 1978, exterior preparation may disturb lead-based paint. The U.S. Environmental Protection Agency explains that renovation, repair, and painting work can create hazardous lead dust and that covered projects must follow lead-safe requirements.
Do not assume exterior scraping is harmless because the work is outdoors. Chips and dust can contaminate soil, porches, walkways, clothing, and nearby interior areas. Ask how the contractor will test or presume lead, contain debris, protect occupants and neighbors, clean the site, and document the work.
9. Build maintenance into the project
Exterior paint should be inspected regularly, especially after severe wind, hail, snow, or moisture events. Small defects are easier and less expensive to correct before water reaches the substrate.
Check horizontal ledges, trim ends, lower siding courses, and areas near roofs or sprinklers.
Look for open caulk joints, hairline cracks, peeling edges, rust, and exposed fasteners.
Clean dirt and biological growth gently before they become embedded.
Touch up damaged areas with the same compatible product after proper preparation.
Keep records of manufacturer, product line, color name, formula, sheen, and application areas.
Maintenance intervals vary because exposure, substrate, preparation, color, product quality, and prior coating history are different on every home. The goal is not to promise an exact number of years; it is to catch wear before protection is lost.
Questions to ask an exterior painting contractor
How will you identify and repair the causes of peeling or staining before painting?
Which primer and topcoat are you recommending for each substrate, and why?
How will you measure acceptable surface moisture and weather conditions?
What preparation is included, and how will landscaping, windows, roofing, concrete, and fixtures be protected?
Will you follow lead-safe requirements if the home may contain lead-based paint?
How many coats and what spread rate are included?
What workmanship and product warranties apply, and what maintenance is required?
A durable exterior begins with a complete plan
The best exterior paint job is not defined by color alone. It is a coordinated system of inspection, repair, cleaning, preparation, priming, coating, application, and maintenance. In Casper, that system must be selected and scheduled for strong sun, frequent wind, snow, moisture, and rapid temperature changes.
Skyline Construction helps homeowners plan exterior improvements with the whole building in mind. If your home needs a fresh exterior, repairs before painting, or a coordinated remodel, our team can evaluate the conditions and recommend a practical path forward.
Plan your Casper exterior painting project
Contact Skyline Construction to discuss exterior painting and related improvements for your home in Casper or the surrounding area.
Skyline Construction LLC
Call: (307) 225-9399
Visit: Skyline307.com
Email: info@skyline307.com
Visit us: 259 S Center, Ste 201, Casper WY 82601